Learn To Program Your Own Tools: Part 2
Friday, March 18, 2022
So in part one I started laying down the basics in creating our own software tools. Now in this next part we're gonna expand what we know to make a more useful program.
Splitting Functions Into Different Modules
Before we get too deep into creating too many lines of code let's split what we have up into different files for better organization.
There's an idea in software engineering called the single responsibility principle. It pretty much means that each file should serve one overall purpose, and each function should serve one purpose, etc, etc. For something simple like what we're doing with the small program we left off with in part one, we will only need two files. The main logic file, and the user interface file.
The user interface file will hold everything that relates to how the program user interacts with the program. For our program, that's the say_hello and the get_name functions. To start, make a new file in the src folder in the project directory called ui.rs. The .rs file extensions tell the compiler that it's a file containing rust code. In this file, we will be putting all of our already written code except for the main function.
src/ui.rs
use std::io;

pub fn say_hello(s: &str) {
    println!("Hello, {}!", s);
}

pub fn get_name() -> String {
    let mut name = String::new();

    println!("What is your name?");

    io::stdin().read_line(&mut name).expect("Error reading from stdin.");

    name
}
Notice the new keyword pub, which is short for public. This lets the functions in the ui file be used outside in other files. Now we need to link it to our main file so we can use the functions in our main function.
src/main.rs
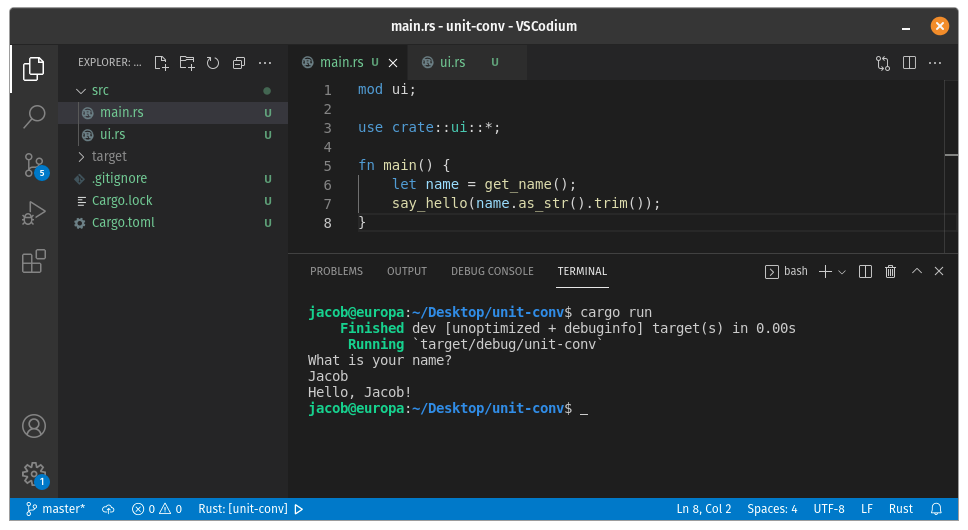
mod ui;

use crate::ui::*;

fn main() {
    let name = get_name();
    say_hello(name.as_str().trim());
}
There's a couple new things here. mod ui; lets the compiler know that there is a file called ui that we will be using. The use crate::ui::*; line brings all the public functions from the ui module into scope of the main file. The keyword crate lets the compiler know to look for the ui library in the project directory. The last new thing is the .trim() call on the name variable. This takes all the leading or trailing white space off of the name variable, fixing our issue of the ! being on its own line in the output.

Making Something More Useful
Now that we have some of the basics under our belt, let's start coding something more useful. A unit conversion tool! Now there are many different types of units, but we'll go with the only one that is consistent across the entire planet, time. We'll convert between Days, Hours, Minutes, and Seconds.
To start, we're going to have to rework our ui.rs file. Update it to match what is below.
src/ui.rs
use std::io;

pub fn get_units(s: &str) -> u8 {
    println!("Please select the {} units:", s);

    let mut input = String::new();
    io::stdin().read_line(&mut input).expect("Error reading from stdin.");
    let input: u8 = input.trim().parse().expect("Error converting String to u8.");

    input
}

pub fn get_value(s: &str) -> f32 {
    println!("Please enter the {} value:", s);

    let mut input = String::new();
    io::stdin().read_line(&mut input).expect("Error reading from stdin.");
    let input: f32 = input.trim().parse().expect("Error converting String to f32.");

    input
}
There isn't much here that we don't know already, save for a piece of one line. let input: f32 = input.trim().parse().expect("Error converting String to f32."); The new part here is the .parse() command. This is a command that will convert a variable from one type to another. This is one of the instances where we want a specific type of variable, so with let input: f32 we are saying that we will reassign the input value, and it needs to be a variable of type f32. The f32 type is a number with a 'floating' decimal value. The u8 type in this file represents an unsigned 8-bit integer number. For those who don't understand, it's a positive only whole number that can be stored in 8-bits of memory. If we were to want to keep track of negative and positive numbers, we would use the i8 type. We don't need to here, so we're sticking with u8.
Next we're going to be adding another file to our project, one to hold all of our auxiliary functions that aren't related to the user interface. We could put these in main.rs, however I like to keep only the main function in the main file to keep things tidy. We'll make a file called utils.rs in the src folder with the following contents.
src/utils.rs
pub fn to_minutes(input: f32, units: u8) -> f32 {
    match units {
        1 => input * 24 as f32 * 60 as f32,
        2 => input * 60 as f32,
        3 => input,
        4 => input / 60 as f32,
        _ => panic!("Unable to convert units. Invalid option supplied.")
    }
}

pub fn from_minutes(input: f32, units: u8) -> f32 {
    match units {
        1 => input / 24 as f32 / 60 as f32,
        2 => input / 60 as f32,
        3 => input,
        4 => input * 60 as f32,
        _ => panic!("Unable to convert units. Invalid option supplied.")
    }
}
So these two functions make use of a match keyword that we haven't used yet. This is a pattern matching tool. Essentially it evaluates the value of units and returns a different function per each value. So, when we match the units variable, if it is of value 2 we will return the result of input * 60 as f32. The as f32 keywords make it so that the 60 value is evaluated as a floating point type, instead of an integer type. We do this because input is required to be f32 type per the function declaration. The compiler can't multiply or divide a floating point number by an integer as they aren't the same type, so we need to specify that our math is to be done in floating point.
Now all we have to do is update our main.rs file to finish it off.
mod ui;
mod utils;

use crate::ui::*;
use crate::utils::*;

fn main() {
    println!("Units:\n  1. Days\n  2. Hours\n  3. Minutes\n  4. Seconds");

    let in_units = get_units("starting");
    let out_units = get_units("final");
    let input = get_value("starting");
    let output = from_minutes(to_minutes(input, in_units), out_units);

    println!("The final value is: {}", output);
}
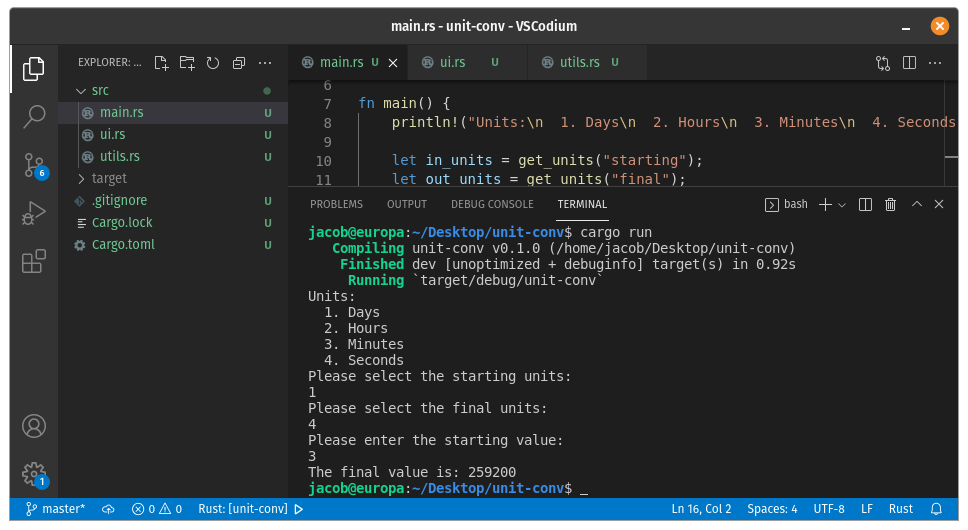
Pretty straight forward. The \n characters in the first println! call is what is referred to as a NewLine character. It will put all text after it on a new line. The rest is all the calls to the functions we have written so far.
Now, when we run our program it should look like the below:

So here we are, we have finally put we know together to make a useful command line program. Now while I and many others are fond of command lines, the modern era prefers a more graphical approach. That will take much more work, so we'll save it for another time.
Let me know what you think, do you want to see a part 3? I'll be more than happy to hear whatever feedback you have.
Jacob